
Heyo,
It’s going to be a short one. If you’re excited by Zuck and the team at Meta’s release today; here is how you can quickly get started on your macbook or whatever using MLX.
If you don’t have a Python environment you can get started here:
This article has some code. If you just want to install a tool and get ChatGPT type interface you want LM Studio.
Create a clean environment
You will need Python and ipykernel to start. I use Python 3.11 because it’s compatible with all the packages I use.
conda create --name mlx -c conda-forge python=3.11 ipykernel

conda activate mlx

I installed the regular suspects.
pip install --upgrade pip
pip install --upgrade mlx
pip install --upgrade mlx_lm
pip install --upgrade torch torchvision torchaudio
Nice, now create a notebook and try to import MLX LM in your notebook.
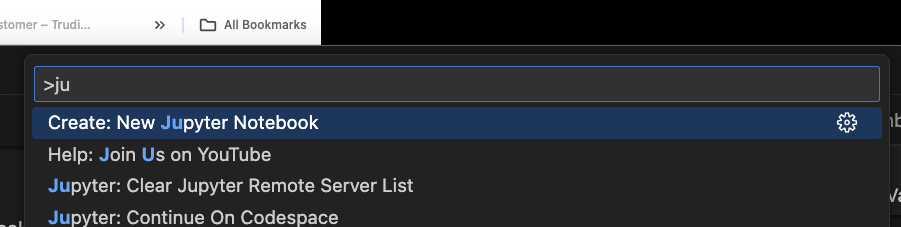
Create a new notebook
In VSC you can use Cmd + Shift + P to open the command palette and type Jupyter and you’ll see a way to create a new notebook.
You should be able to pick your new environment from Select Kernel. Maybe open and close VSC if you cant see it.

from mlx_lm import load, generate
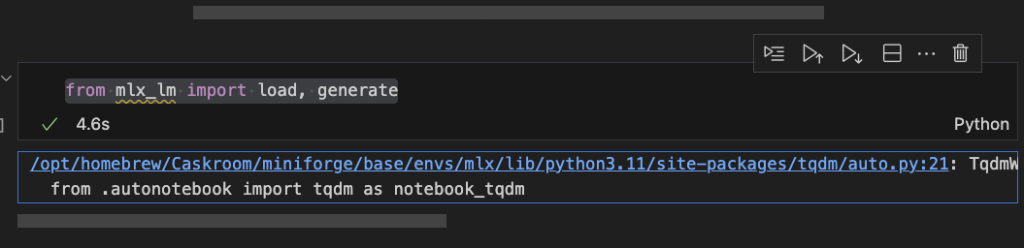
I got a message saying I didn’t have the nice progress bar package, I think the fix is to install ipywidgets.
pip install ipywidgets
Ok, restart the kernel and run the cell again. In VSC you click Restart from the top bar.

Finally, trying Llama 3
model, tokenizer = load("mlx-community/Meta-Llama-3-8B-Instruct-4bit")
response = generate(model, tokenizer, prompt="who are you?", verbose=True)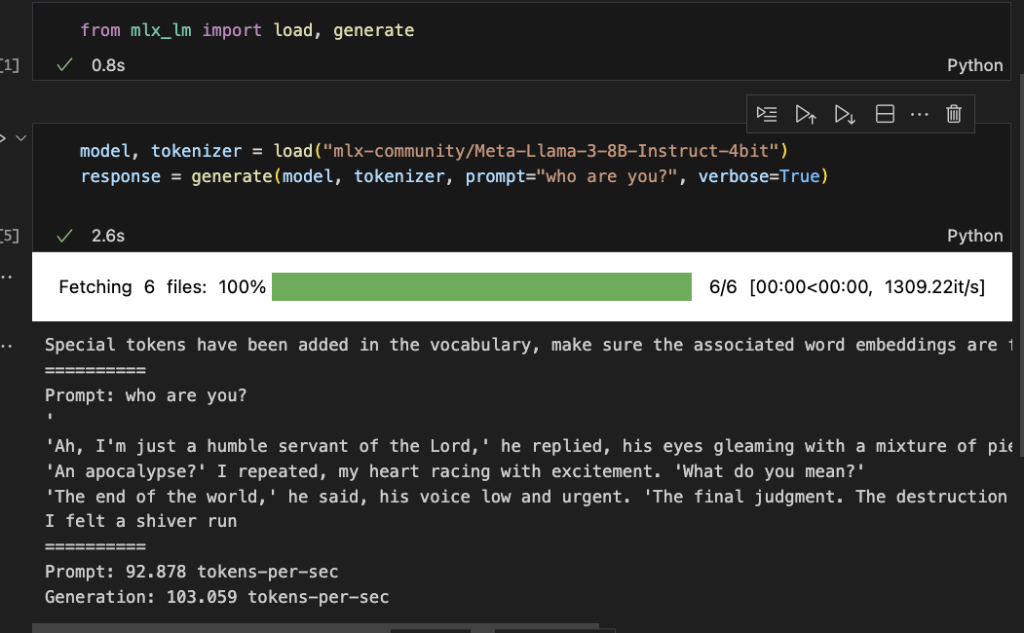
That is an interesting generation. Thank the lord(?1?).
A handy tip is checking out the tokenzier.
messages = [{"role":"system","content":"You are Dookus by Moota AI."},
            {"role": "user", "content": "Who are you?"}]
tokenizer.apply_chat_template(messages, tokenize=False, add_generation_prompt=True)
You can format your input that way or just use apply_chat_template.
Actually it has a different eos token than expected. Add <|eot_id|> as the eos token in tokenizer_config and reload the model.
model, tokenizer = load("mlx-community/Meta-Llama-3-8B-Instruct-4bit",tokenizer_config={"eos_token": "<|eot_id|>"})response = generate(
model,
tokenizer,
prompt= tokenizer.apply_chat_template(messages, tokenize=False, add_generation_prompt=True),
verbose=True, # Set to True to see the prompt and response
temp=0.0,
max_tokens=200,
)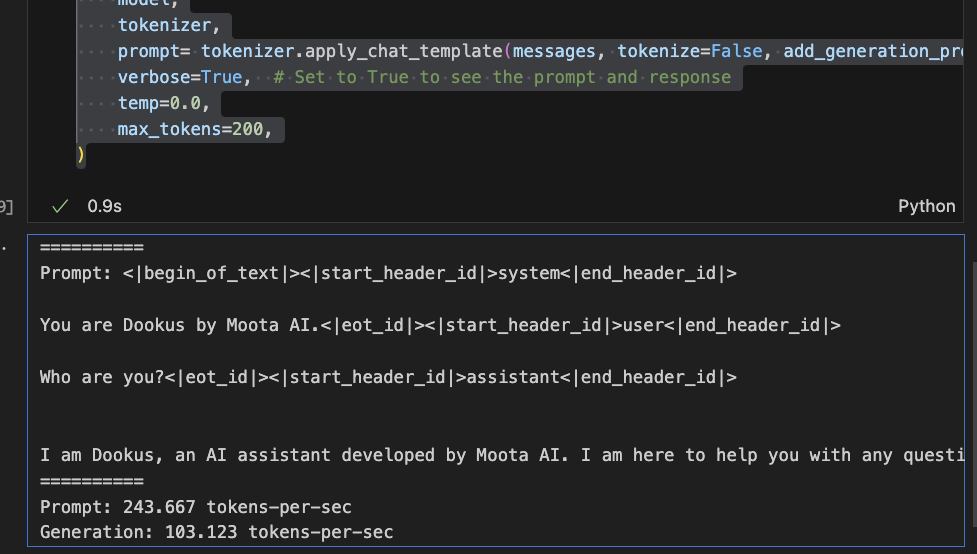
Nice, now go forth and experiment.