Hey, if you’re reading this then you must be desperate. To follow along you need to know Python and understand OOP.
Create a folder where you want your stuff. I called mine Applis for applications. Open it in VSC or whatever editor.
Open up terminal and hit this
conda create -n apps python=3.10
conda activate apps
We want briefcase.
pip install briefcase
Your terminal will tell you what folder you’re in; if you aren’t in the correct one then change directory to it.
My folder is called Applis.

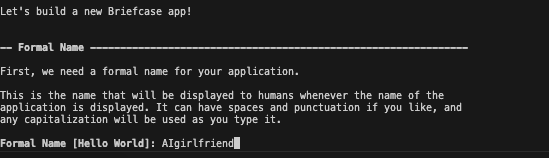
briefcase new
Pick whatever you want for the name:
and everything else

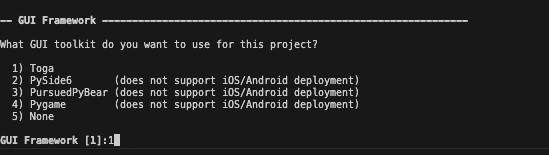
For GUI framework though use Toga. FYI you will still need a Macx to make an iOS app. If you have one though you can make iOS and Android apps with Python. If you don’t then this article is practically make an Android app with Python.
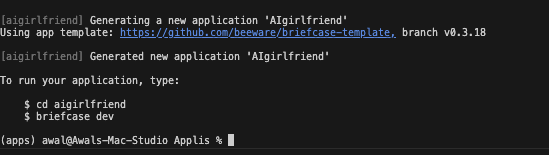
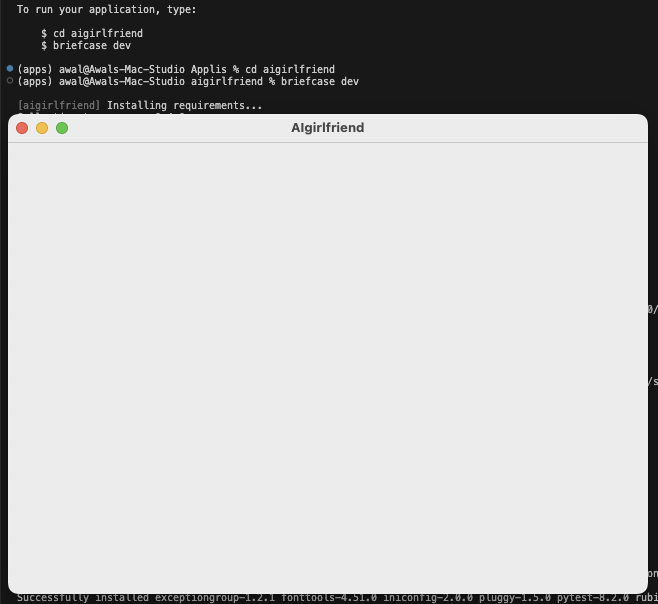
Nice. Now cd in there and run it we’ll see an empty window which is our application.
briefcase dev
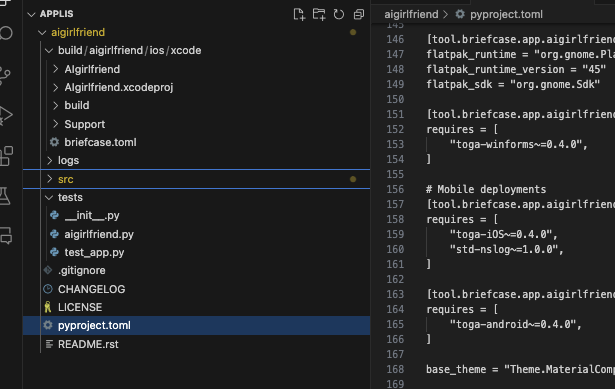
Have a look at all the files that were generated. The src folder contains all the important ones. We’ll be editing app.py to add functionality.
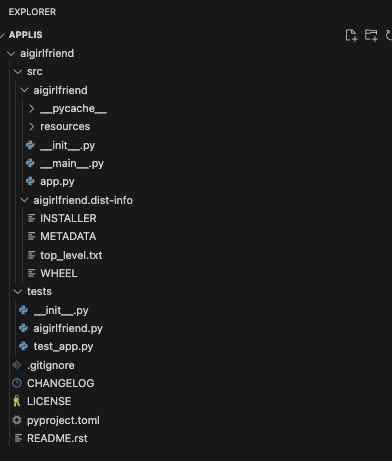
App.py and adding our own functionality.
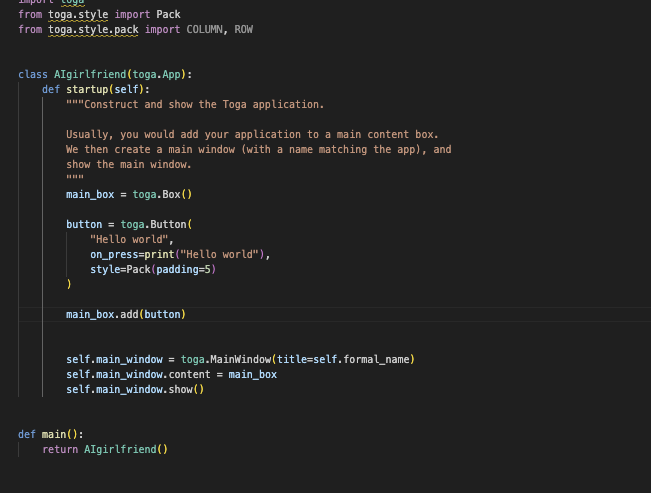
Once you open the file you should see something like this
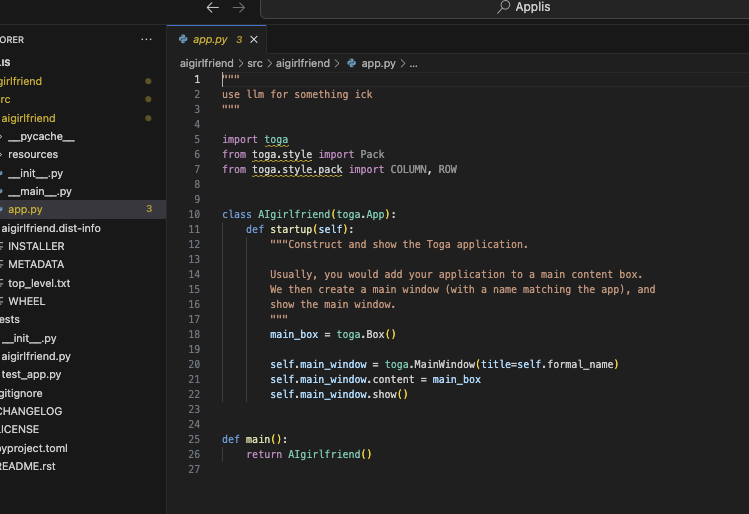
Your app is contained within that fine class. We need a startup method that contains all the information for how it starts.
Lets add a button to it. Close the blank window and add a button.
"""
use llm for something ick
"""
import toga
from toga.style import Pack
from toga.style.pack import COLUMN, ROW
class AIgirlfriend(toga.App):
def startup(self):
"""Construct and show the Toga application.
Usually, you would add your application to a main content box.
We then create a main window (with a name matching the app), and
show the main window.
"""
main_box = toga.Box()
button = toga.Button(
"Hello world",
on_press=print("Hello world"),
style=Pack(padding=5)
)
self.main_window = toga.MainWindow(title=self.formal_name)
self.main_window.content = main_box
self.main_window.show()
def main():
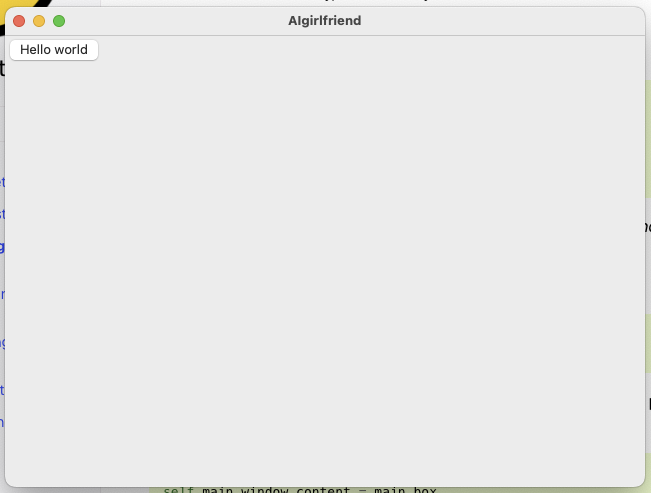
return AIgirlfriend()Now run it again.
briefcase dev
It’s still blank…
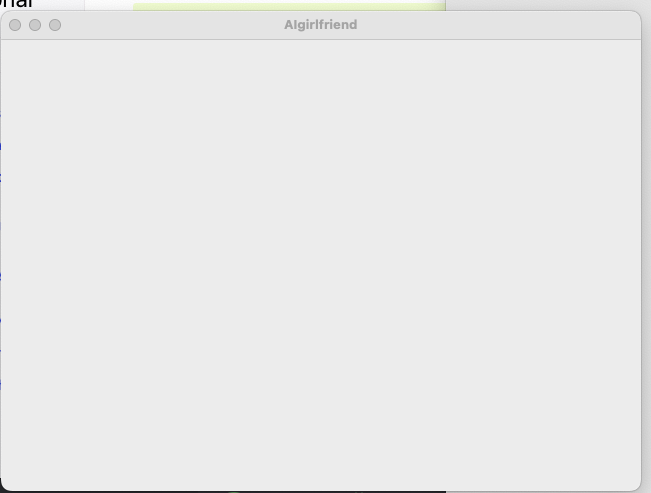
Because toga.Box() determines what is shown. We have called it main_box.
main_box.add(button)
Nice we see the button. Clicking it does nothing.
We can make a simple method to assign to the button. Feel free to make your own function within the class.
    def hullo(self,widget):
        print(f"Hello, World")
Now we have to make the button use this method. We access it like self.funcname since the method is in the class.
        button = toga.Button(
            "Hello world",
            on_press=self.hullo,
            style=Pack(padding=5)
        )
If you don’t understand why then you probably need to brush up on classes.
This is what I have so far.
"""
use llm for something ick
"""
import toga
from toga.style import Pack
from toga.style.pack import COLUMN, ROW
class AIgirlfriend(toga.App):
def startup(self):
"""Construct and show the Toga application.
Usually, you would add your application to a main content box.
We then create a main window (with a name matching the app), and
show the main window.
"""
main_box = toga.Box()
button = toga.Button(
"Hello world",
on_press=self.hullo,
style=Pack(padding=5)
)
main_box.add(button)
self.main_window = toga.MainWindow(title=self.formal_name)
self.main_window.content = main_box
self.main_window.show()
def hullo(self,widget):
print(f"Hello, World")
def main():
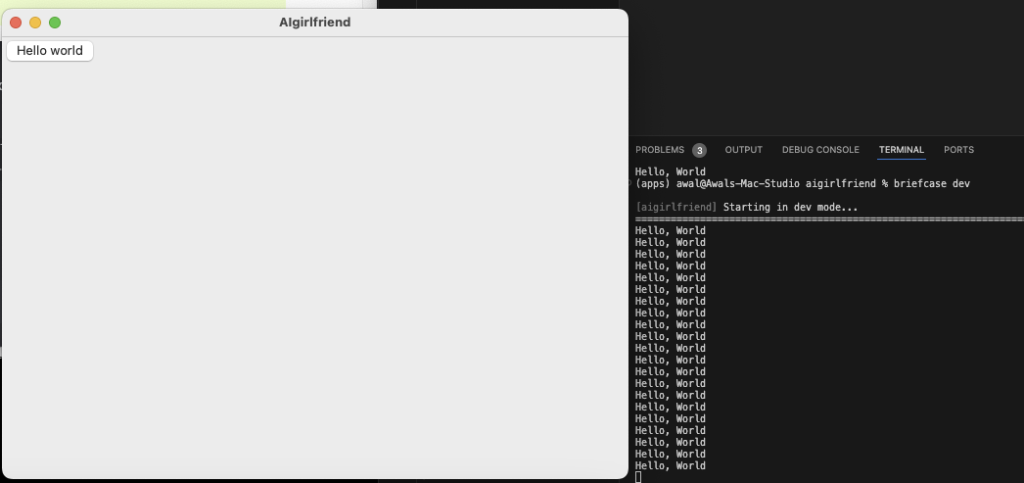
return AIgirlfriend()If we run it now, clicking the button should print ‘Hello, Word’.
AI girlfriend.
Ok I won’t make an AI girlfriend but you can. I’ll just make a generic assistant. We need a text box to talk to the LLM and display the response in chat format.
We’ll have to look at the toga references to find appropriate widgets.
https://toga.readthedocs.io/en/stable/reference/api/index.html
They have something called MultiTextInput.
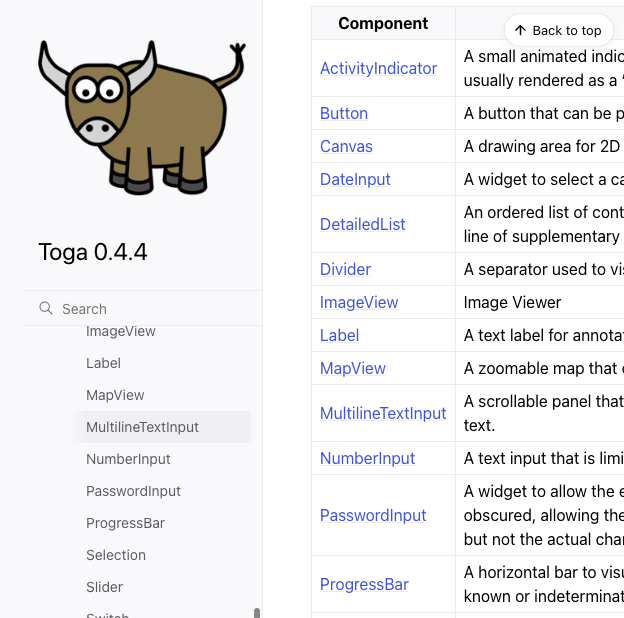
If you go to the page you can see how it is used.
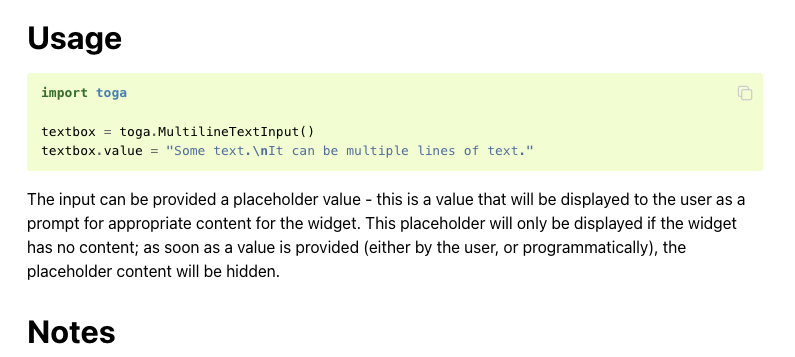
We can copy paste that, remember to add it to main_box.
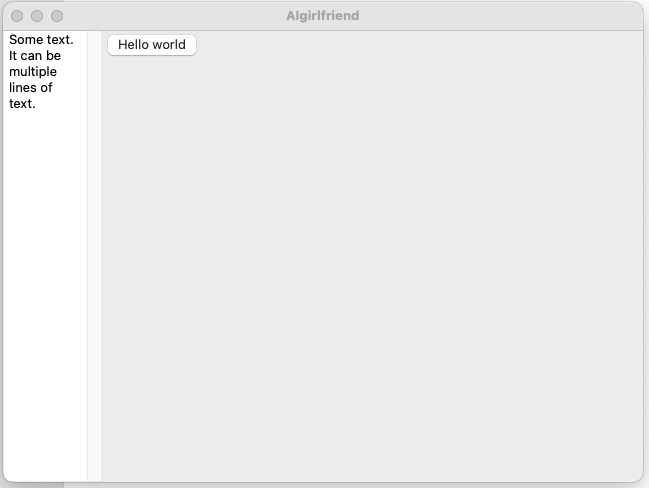
        textbox = toga.MultilineTextInput()
        textbox.value = "Some text.\nIt can be multiple lines of text."

        main_box.add(textbox)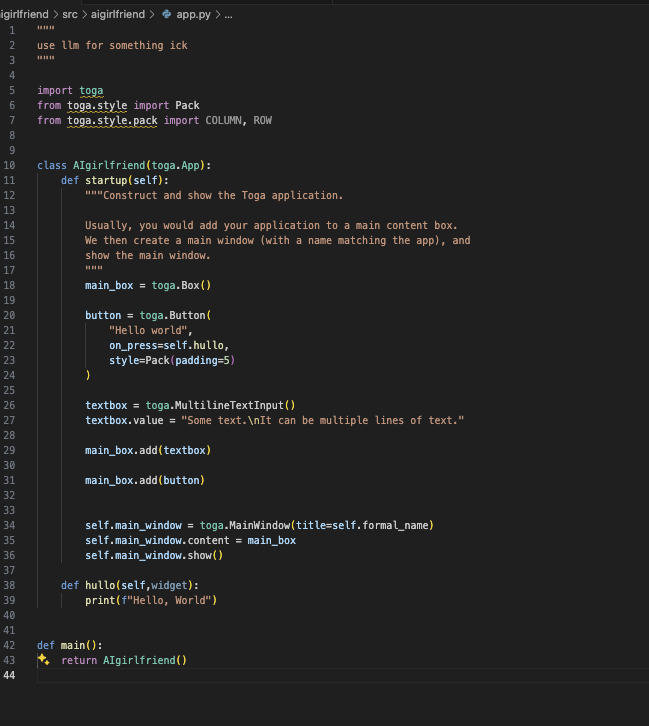
Now if we run briefcase dev in terminal we should see the textbox.
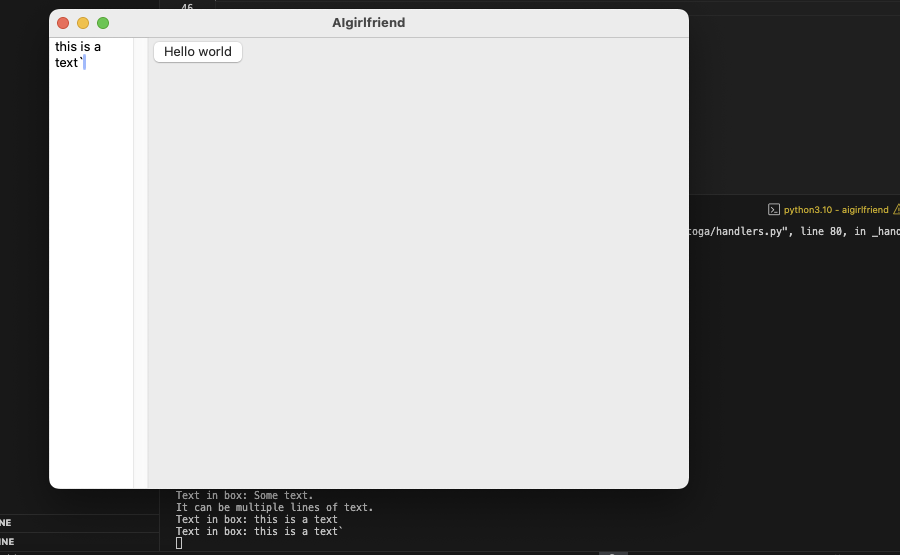
We can make hullo function more interesting. Lets print whatever we type in the textbox instead. We have to make a couple of changes. Currently the textbox isn’t an instance of textbox. We’ll have to add self before it so that hullo can access it.
        # Define the textbox as an instance attribute
        self.textbox = toga.MultilineTextInput()
        self.textbox.value = "Some text.\nIt can be multiple lines of text."

        main_box.add(self.textbox)
Now we can update hullo, you’ll notice it already has (self,x) so we can just access the textbox by referring to it properly.
    def hullo(self, widget):
        # Access the value of the textbox and print it
        print(f"Text in box: {self.textbox.value}")
You’ve updated textbox and the hullo method now run it with briefcase dev.
Whatever you type in there will print in your terminal when you click the button.
It’s annoying that it prints in the terminal. It would be nicer to have it in the app window.
We can find another widget in Toga. I’m using label.
Add these in the startup(self)
        self.label = toga.Label('Label')
        main_box.add(self.label)
In the hullo function make the label whatever is in the textbox.
    def hullo(self, widget):
        # Access the value of the textbox and print it
        print(f"Text in box: {self.textbox.value}")
        self.label.text = self.textbox.value
Cool.
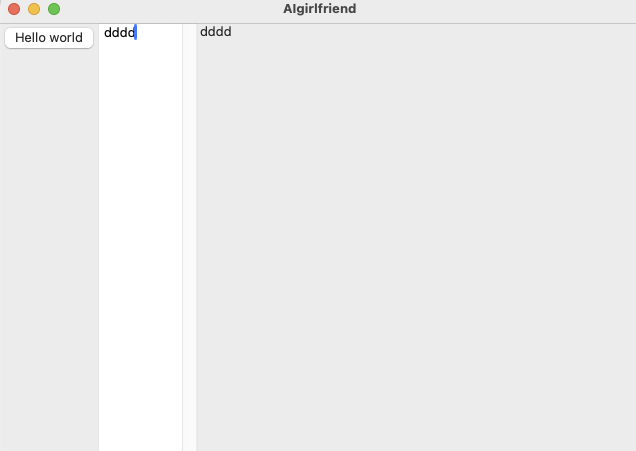
The layout is all janky but it works.
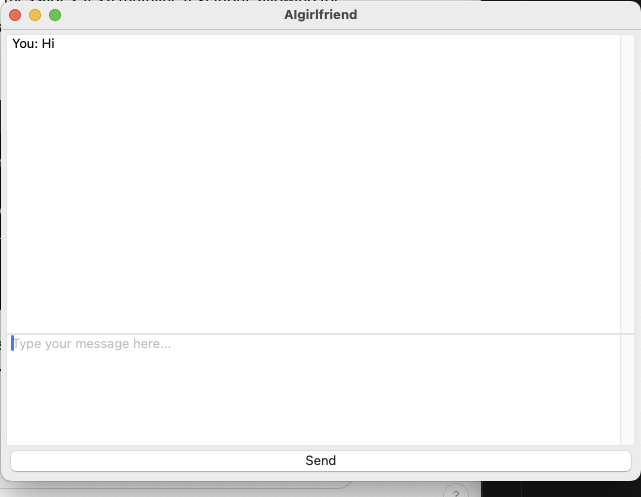
Styling the app like a chat.
We can add style to them to make it less bad by reading up on Toga Pack Style Engine.
https://toga.readthedocs.io/en/stable/reference/style/pack.html
Ok if we want to stack widgets vertically we need a column layout.
main_box = toga.Box(style=Pack(direction=COLUMN, padding=5))
If we do flex = 1 then the widgets should take the entire width. If multiple widgets share a container then 1 means it’ll take 1/nth of the space. With a widget by itself it takes 1/1th or 100% of the space. I want a wide textbox.
# Textbox where user types their message
self.textbox = toga.MultilineTextInput(style=Pack(flex=1))
self.textbox.placeholder = "Type your message here..."
Also labels seemed like the wrong widget for a chat history, let us also make the chat history MultilineTextInput.
        # Label to display messages, acting as a chat history
        self.chat_history = toga.MultilineTextInput(readonly=True, style=Pack(flex=1, height=300))
        self.chat_history.placeholder = "Messages will appear here..."
The hullo function was fine earlier but I’m a fan of calling things what they are either make a new function or replace the hullo one with something that adds to the chat history and clears the textbox.
def update_chat(self, widget):
  """Update the chat history label with the text from the textbox."""
  # Get the user message, add it to chat history, and clear the textbox
  message = self.textbox.value.strip()
  if message:
    self.chat_history.value += f"You: {message}\n"
    self.textbox.value = ''  # Clear the input after sending
Fk we need to update the button now.
        # Button to send the message
        button = toga.Button(
            "Send",
            on_press=self.update_chat,
            style=Pack(padding=5)
        )
My revised code looks like this
import toga
from toga.style import Pack
from toga.style.pack import COLUMN, ROW

class AIgirlfriend(toga.App):
    def startup(self):
        """Construct and show the Toga application.

        This app simulates a simple chat interface where the user types a message,
        hits 'Send', and sees their message appear above in a label, simulating a chat history.
        """
        # Main layout box
        main_box = toga.Box(style=Pack(direction=COLUMN, padding=5))

        # Textbox where user types their message
        self.textbox = toga.MultilineTextInput(style=Pack(flex=1))
        self.textbox.placeholder = "Type your message here..."

        # Button to send the message
        button = toga.Button(
            "Send",
            on_press=self.update_chat,
            style=Pack(padding=5)
        )

        # Label to display messages, acting as a chat history
        self.chat_history = toga.MultilineTextInput(readonly=True, style=Pack(flex=1, height=300))
        self.chat_history.placeholder = "Messages will appear here..."

        # Adding components to the main box
        main_box.add(self.chat_history)
        main_box.add(self.textbox)
        main_box.add(button)

        # Configure and show the main window
        self.main_window = toga.MainWindow(title=self.formal_name)
        self.main_window.content = main_box
        self.main_window.show()

    def update_chat(self, widget):
        """Update the chat history label with the text from the textbox."""
        # Get the user message, add it to chat history, and clear the textbox
        message = self.textbox.value.strip()
        if message:
            self.chat_history.value += f"You: {message}\n"
            self.textbox.value = ''  # Clear the input after sending

def main():
    return AIgirlfriend()
If we run it then it looks like a chat app.
Getting AI replies
You need to pick an API. Pick Groq because fast. You can do OpenAI or your own local model if you know how. Lets fake it first and then add it proper.
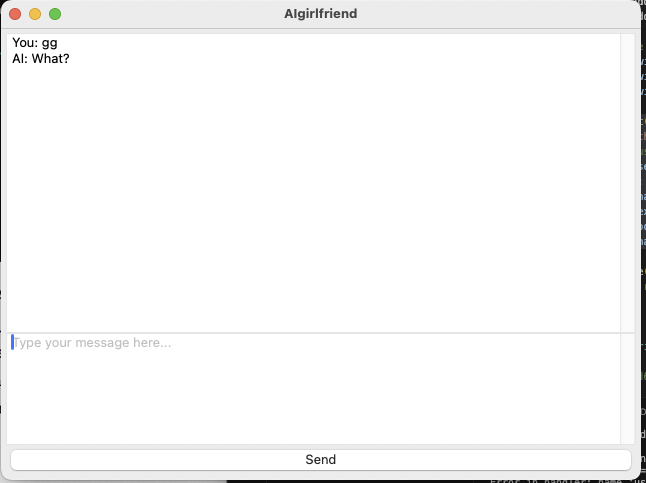
You need a new function just put it outside of the class under your code somewhere before main(). We want it to say “What?” each time we send a message.
def get_ai_response(user_message):
    # Simulated AI response
    return "What?"
Easy now we call this function each time we send a message and append it to the chat history.
        def update_chat(self, widget):
        """Update the chat history label with the text from the textbox."""
        # Get the user message, add it to chat history, and clear the textbox
        message = self.textbox.value.strip()
        if message:
            self.chat_history.value += f"You: {message}\n"
            self.textbox.value = ''  # Clear the input after sending
            ai_response = get_ai_response(message)
            self.chat_history.value += f"AI: {ai_response}\n"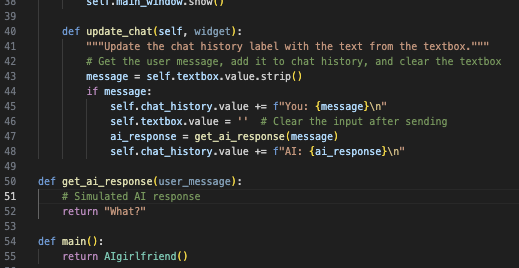
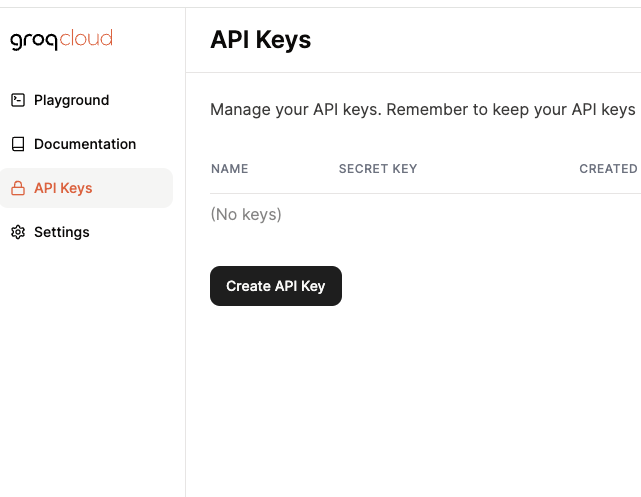
Go here and sign up. I don’t earn anything and not sponsored, I’m independently wealthy.
You need an API key. Create one and copy it many times.
We need to fetch the AI response each time the user sends a message.
To use their API we can either use OpenAI’s package or install their own package. Lets go with OpenAI only because we have the option of using their models or local models with LMStudio etc.
pip install openai
we need to import it at the top
from openai import OpenAI
Since we are using Groq we need to change the base_url.
client = OpenAI(base_url="https://api.groq.com/openai/v1", api_key="YOUR_KEY")
Do all the things you do to protect your key but be aware that I’m going to paste it right in the app because idc. Just kidding, I have it in a .env file; but you do you.
Update the get_ai_response function.
def get_ai_response(user_message):
    # Simulated AI response
    chat_completion = client.chat.completions.create(
    messages=[
        {
            "role": "user",
            "content": f"{user_message}",
        }
    ],
    model="llama3-8b-8192",
)
    return chat_completion.choices[0].message.content
This is the entire code.
import toga
from toga.style import Pack
from toga.style.pack import COLUMN, ROW
from openai import OpenAI

client = OpenAI(base_url="https://api.groq.com/openai/v1", api_key="KEY")

class AIgirlfriend(toga.App):
    def startup(self):
        """Construct and show the Toga application.

        This app simulates a simple chat interface where the user types a message,
        hits 'Send', and sees their message appear above in a label, simulating a chat history.
        """
        # Main layout box
        main_box = toga.Box(style=Pack(direction=COLUMN, padding=5))

        # Textbox where user types their message
        self.textbox = toga.MultilineTextInput(style=Pack(flex=1))
        self.textbox.placeholder = "Type your message here..."

        # Button to send the message
        button = toga.Button(
            "Send",
            on_press=self.update_chat,
            style=Pack(padding=5)
        )

        # Label to display messages, acting as a chat history
        self.chat_history = toga.MultilineTextInput(readonly=True, style=Pack(flex=1, height=300))
        self.chat_history.placeholder = "Messages will appear here..."

        # Adding components to the main box
        main_box.add(self.chat_history)
        main_box.add(self.textbox)
        main_box.add(button)

        # Configure and show the main window
        self.main_window = toga.MainWindow(title=self.formal_name)
        self.main_window.content = main_box
        self.main_window.show()

    def update_chat(self, widget):
        """Update the chat history label with the text from the textbox."""
        # Get the user message, add it to chat history, and clear the textbox
        message = self.textbox.value.strip()
        if message:
            self.chat_history.value += f"You: {message}\n"
            self.textbox.value = ''  # Clear the input after sending
            ai_response = get_ai_response(message)
            self.chat_history.value += f"AI: {ai_response}\n"

def get_ai_response(user_message):
    # Simulated AI response
    chat_completion = client.chat.completions.create(
    messages=[
        {
            "role": "user",
            "content": f"{user_message}",
        }
    ],
    model="llama3-8b-8192",
)
    return chat_completion.choices[0].message.content

def main():
    return AIgirlfriend()
Let’s try it.
It’s so fast.
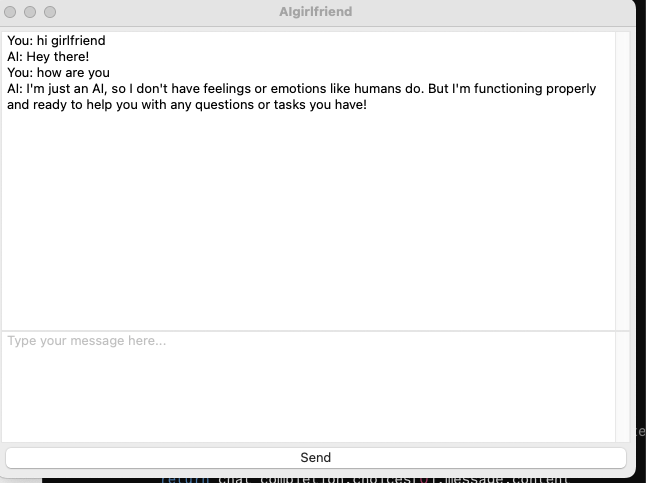
Change the prompt and add a system prompt.
def get_ai_response(user_message):
    # Simulated AI response
    chat_completion = client.chat.completions.create(
    messages=[
        {"role": "system", "content": "You are an AI girlfriend."},
        {
            "role": "user",
            "content": f"{user_message}",
        }
    ],
    model="llama3-8b-8192",
)
    return chat_completion.choices[0].message.content
Crap we ended up making an AI girlfriend.
iOS mobile app.
Alright for iOS we need Xcode. If you don’t have it then get it from the app store.
type this in terminal
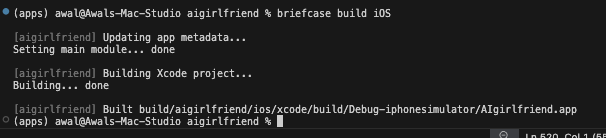
briefcase create iOS
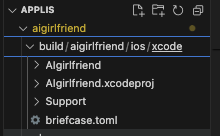
Once it is done we will have an Xcode project in the same folder in the subfolder called build.
Compile it using
briefcase build iOS
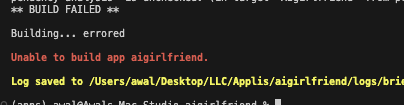
Fk, my build failed.
Open your project’s Xcode folder in Xcode. You won’t have to do this if you have successfully built an app before. I don’t know what is wrong and the log file does not have a tldr.
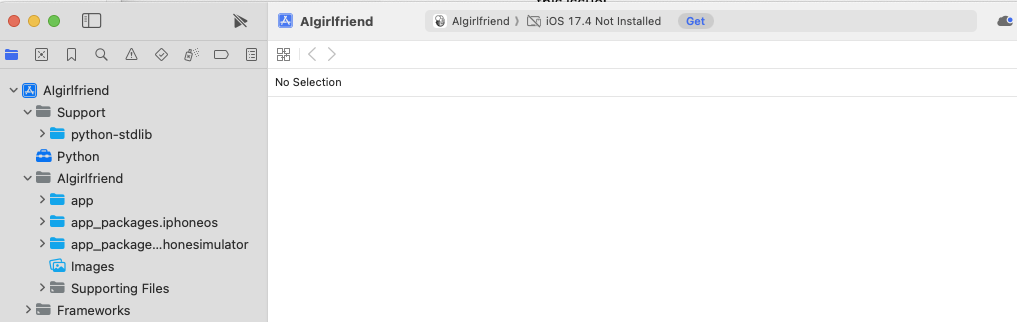
On the top you see iOS not installed. Fix it by clicking Get.
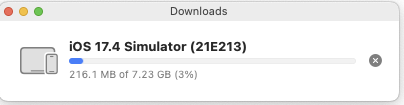
If you’re somewhere with slow internet then I’m sorry.
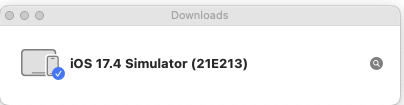
Once you see the above run it again.
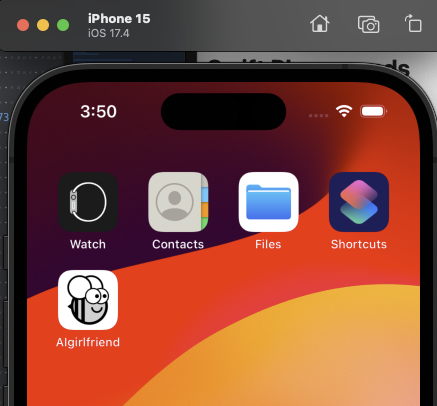
Congrats, you made your first mobile app with Python.
briefcase run iOS
Pick an iphone
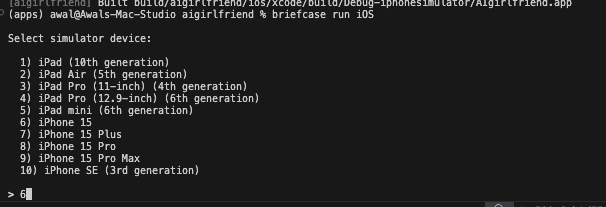
Fk doesn’t work.

We need to add openai as a dependency to our pyproject.toml file and build it again.
Find it somewhere in the folder.
I put openai in requires = [] which is at the top. If it’s in there that means it’s required for everything.
requires = [    "openai==1.27.0",
    "pydantic==1.9.0",]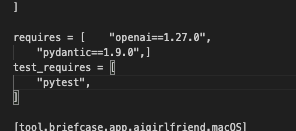
I had tried adding it to # Mobile deployments only but it didn’t work. It’s fine because we need it for all the builds anyway.
Now we need to let briefcase know we updated our dependencies.
briefcase update -r
briefcase create ios
briefcase build iOS
briefcase run iOS
It’s too fast.
Entire code is here:
import toga
from toga.style import Pack
from toga.style.pack import COLUMN, ROW
from openai import OpenAI

client = OpenAI(base_url="https://api.groq.com/openai/v1", api_key="KEY")

class AIgirlfriend(toga.App):
    def startup(self):
        """Construct and show the Toga application.

        This app simulates a simple chat interface where the user types a message,
        hits 'Send', and sees their message appear above in a label, simulating a chat history.
        """
        # Main layout box
        main_box = toga.Box(style=Pack(direction=COLUMN, padding=5))

        # Textbox where user types their message
        self.textbox = toga.MultilineTextInput(style=Pack(flex=1))
        self.textbox.placeholder = "Type your message here..."

        # Button to send the message
        button = toga.Button(
            "Send",
            on_press=self.update_chat,
            style=Pack(padding=5)
        )

        # Label to display messages, acting as a chat history
        self.chat_history = toga.MultilineTextInput(readonly=True, style=Pack(flex=1, height=300))
        self.chat_history.placeholder = "Messages will appear here..."

        # Adding components to the main box
        main_box.add(self.chat_history)
        main_box.add(self.textbox)
        main_box.add(button)

        # Configure and show the main window
        self.main_window = toga.MainWindow(title=self.formal_name)
        self.main_window.content = main_box
        self.main_window.show()

    def update_chat(self, widget):
        """Update the chat history label with the text from the textbox."""
        # Get the user message, add it to chat history, and clear the textbox
        message = self.textbox.value.strip()
        if message:
            self.chat_history.value += f"You: {message}\n"
            self.textbox.value = ''  # Clear the input after sending
            ai_response = get_ai_response(message)
            self.chat_history.value += f"AI: {ai_response}\n"

def get_ai_response(user_message):
    #Simulated AI response
    chat_completion = client.chat.completions.create(
    messages=[
        {"role": "system", "content": "You are an AI girlfriend."},
        {
            "role": "user",
            "content": f"{user_message}",
        }
    ],
    model="llama3-8b-8192",
)
    return chat_completion.choices[0].message.content

def main():
    return AIgirlfriend()