Hi,
If you were expecting it to be an intuitive UI, then you probably want one of the App Store apps; a decent one is called ‘Draw Things’ and it’s free.
We will use ComfyUI, an advanced AI image generator. It’s easy to install for Windows and comes with a direct download. For Mac, however, you’ll need to install a few more things to run a generative image models on Apple.
A diffusion model is a generative model. It learns by adding gradual noise to an image. Since we know what noise was added, we can then train the model to de-noise the data. If a model knows how to de-noise data to get to various images then with a sufficiently trained model, we can give it a noisy image and make it generate whatever image. We’ll use Stable Diffusion and variants in ComfyUI.
ComfyUI
The UI is basically a flow chart. If you’ve used ShaderGraph in Unity before, it will look familiar. If you haven’t, then it might take a bit more time to get used to it. You basically create a spaghetti of interconnected nodes, each of which adds different functionality towards generating your image.
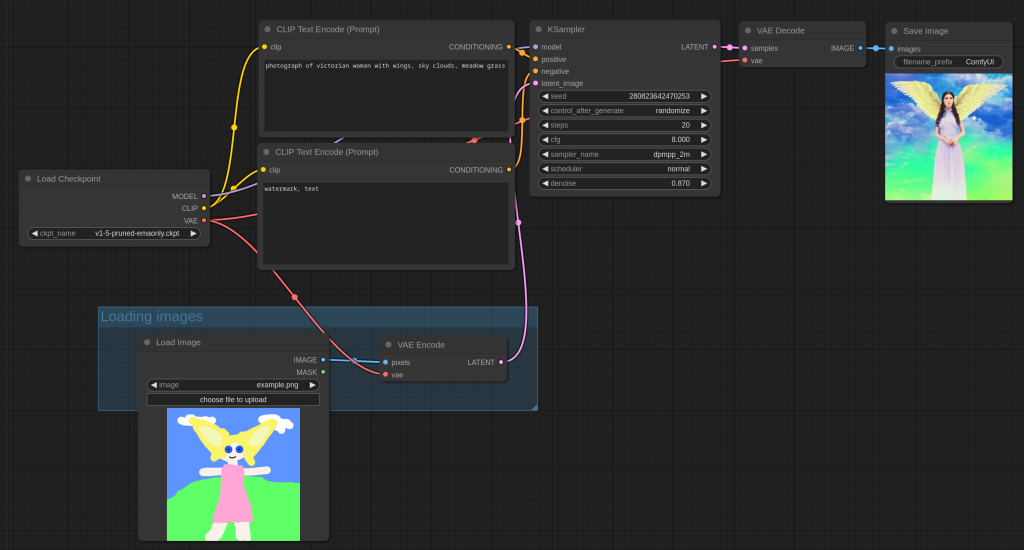
Diffusion models let you do a lot of different things beyond image generation. The above is an example of image to image, and there are other applications like creating 3D models from an image, style transfer, editing images etc. by changing some nodes via the same UI.
A non-comprehensive list of all their examples can be found here:
You can explore those once we have it installed.
Python
It’ll help if you already have a conda environment. If not you can set up from here:
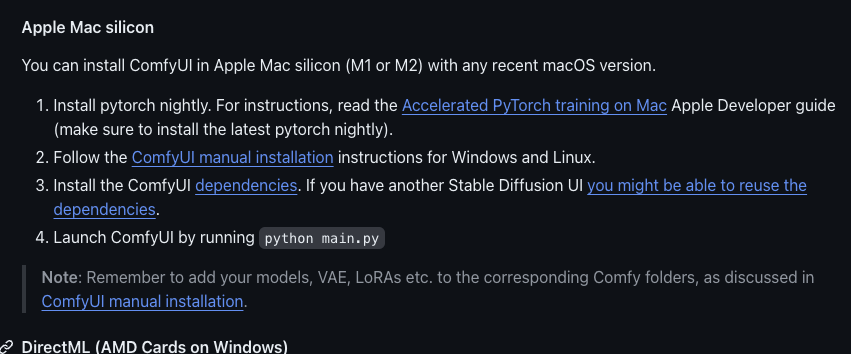
Installing ComfyUI on Mac x
They have installation instructions hidden somewhere in the middle of their doc:
Sweet, so open up terminal. I use the one from within VSC.
conda create -n comfyui python=3.10
conda activate comfyui
We need the nightly build of PyTorch. On the official PyTorch website they have a handy command to install it.
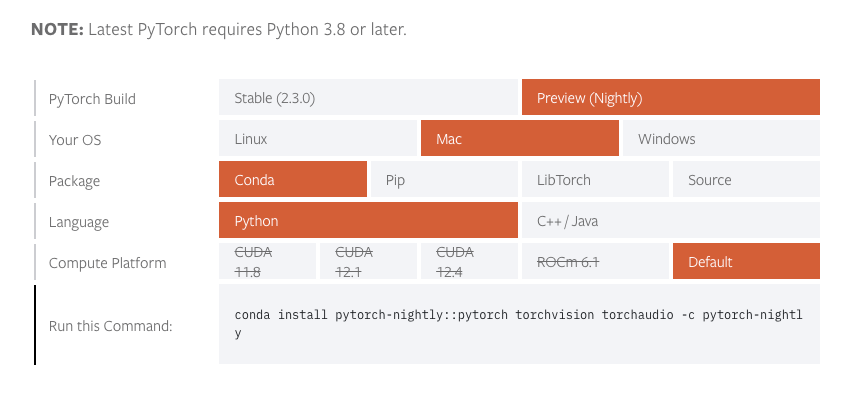
conda install pytorch-nightly::pytorch torchvision torchaudio -c pytorch-nightly
It installed properly on 3.10 but failed on 3.11 so hopefully you did the right thing and copied the python version from earlier.
Alright, last thing to do is pick a folder where you want to download the ComfyUI files to and open it in VSC.
We git clone the official repo and we done.
git clone https://github.com/comfyanonymous/ComfyUI.git

There is a main.py in there.

cd ComfyUI
python main.py
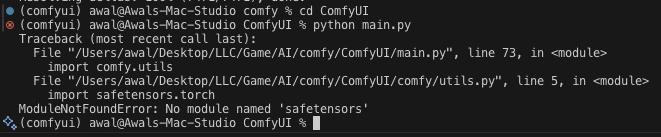
Crap, we need dependencies. It’s in the requirements.txt.
conda install --file requirements.txt
Ok that did not work.
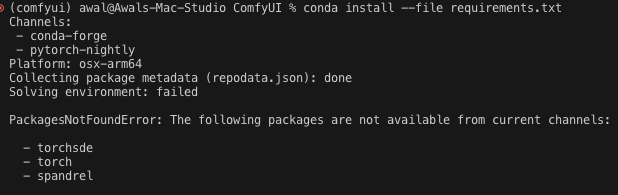
Conda-forge and conda repos do not always have the packages we need. This means we need to use pip.
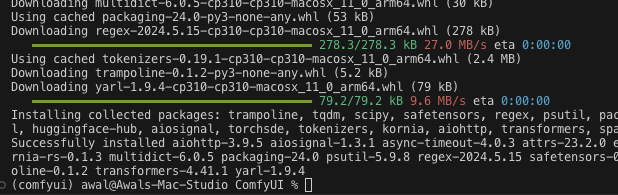
pip install -r requirements.txt
Thankfully, it’s done.
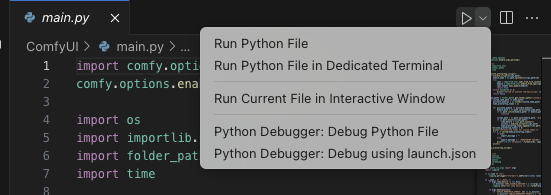
We can run main.py again. If you use VSC you can click the play button on main.py. I prefer to use the terminal because I have many environments and using the terminal means it’s going to always run in my active environment.
or
python main.py
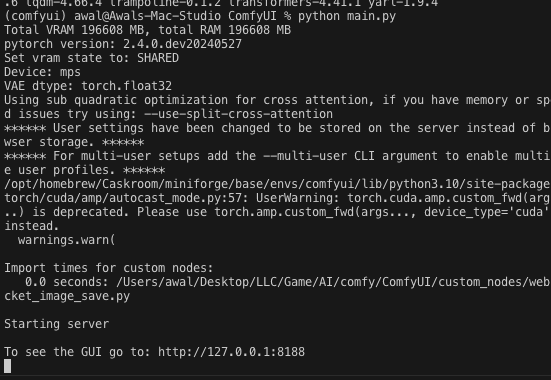
Nice, now go to that link.
What a beauty. 🍝
Generating your first image
In my case it’ll be generating a simple image so I can introduce you to the models. There is a lot of complexity you can add with custom nodes etc. but it’s probably best to start with the basics.
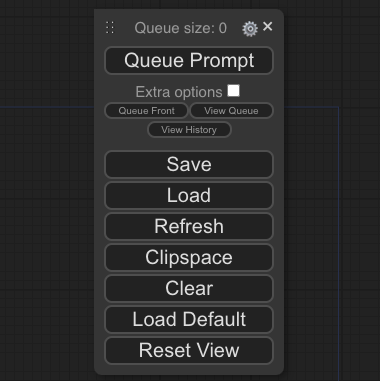
If you hit “Clear”, you’ll end up with an empty workflow.
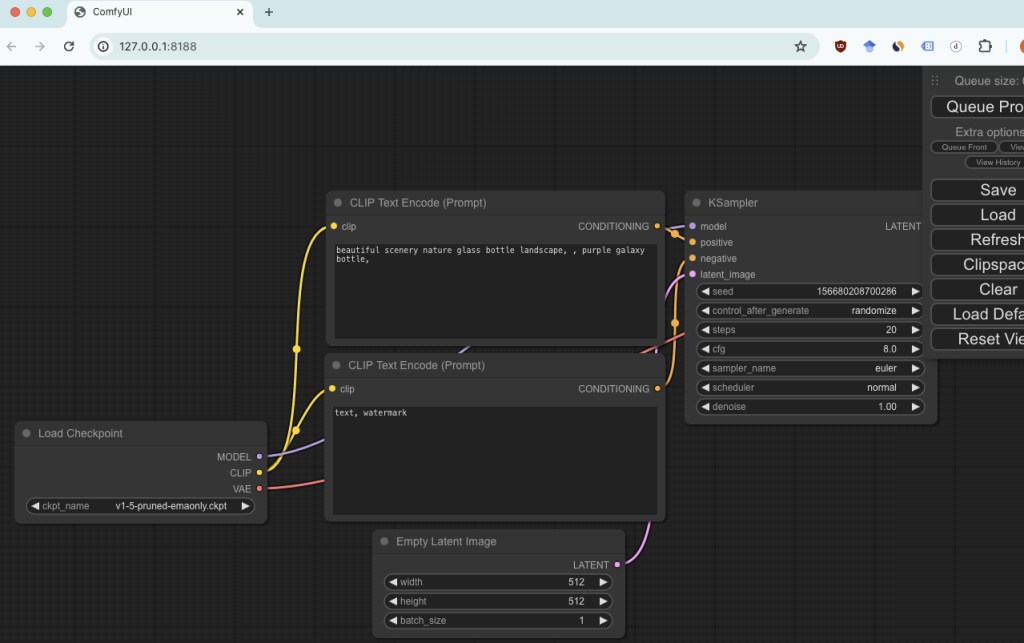
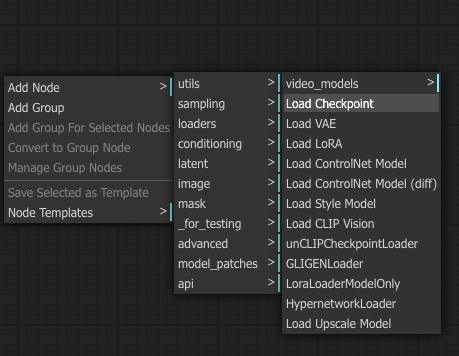
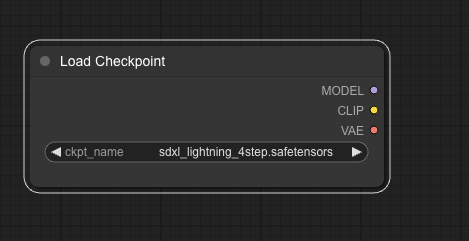
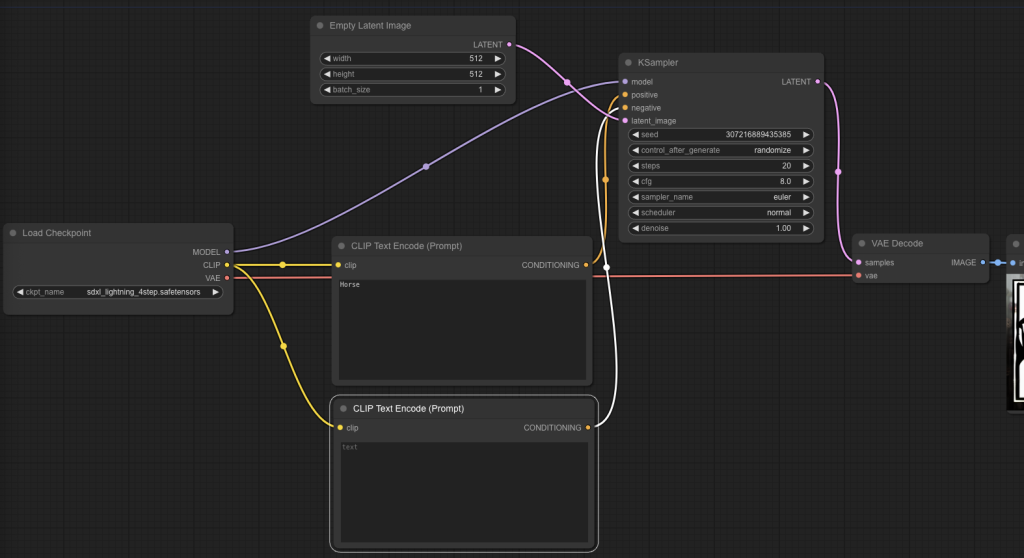
First, we want to load a model. So let’s add a model loading node by right-clicking somewhere in there, then Add Node – loaders – Load Checkpoint.
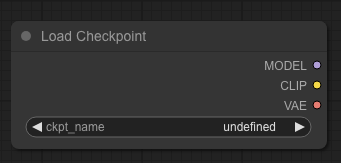
Ok, so there are three thing in there. The model is the diffusion model.
CLIP stands for Contrastive Language Image Pre-training. It turns text into a representation that the main model can understand. Just call it a text encoder.
VAE is a Variable Auto Encoder; you can encode something into a space, think of it like compression and once you have that representation you can decode it either back to the original data or some other representation. If it makes no sense then maybe this will help – we need a way to translate your image from latent space that the model understands to the pixel space your image viewer understands. To do this we use a VAE.
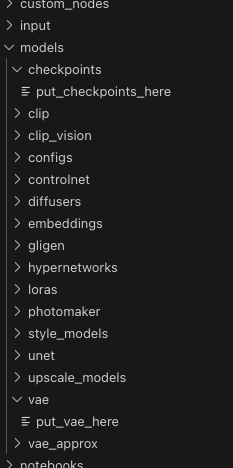
Let’s load up a model and (hopefully) make it make sense. So, if you’re too memory poor maybe you need a smaller model. The models go in their respective folders.
Now, we hunt for models. You can go on huggingface and look for models or on Civitai (it’s cringy(er) but has nice options).
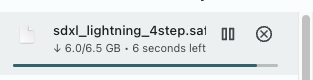
I use huggingface. There is a model trending by the TikTok people today (May 2024). So I’ll download it.
https://huggingface.co/ByteDance/SDXL-Lightning/tree/main
You want the 4step.safetensors and put it in the models/checkpoints folder.

I have gigabit down (and like 20 mb upload) so it was quick but the models can be a struggle for slow internet.
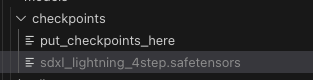
Maybe refresh the browser and pick the model in the Load Checkpoint node.
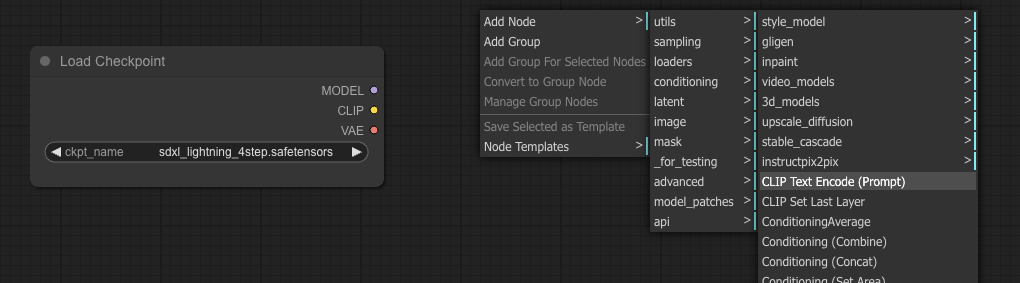
We need to encode our text or prompt.
Now, let’s use Add Node – conditioning – CLIP Text Encode.
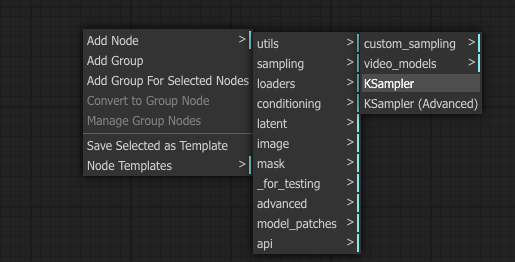
An important piece of the puzzle is how does it all come together? We need a K-Sampling node. Add Node – sampling – KSampler.
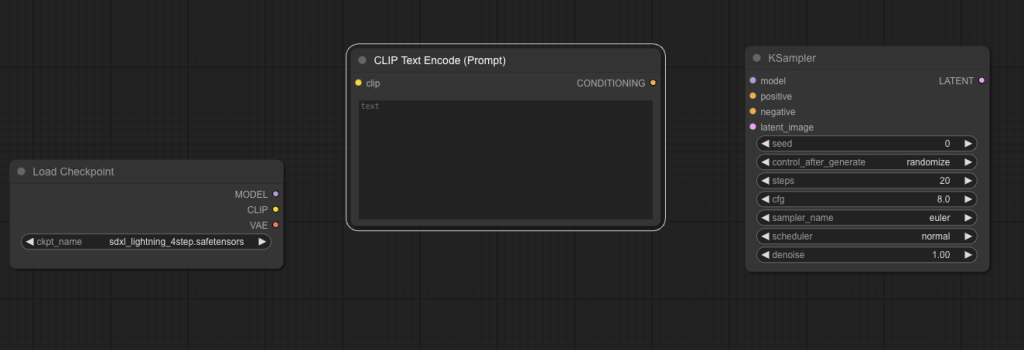
Now, your canvas should look like this:
I hope you remember from latent to pixel space we need the VAE model. So Add Node – latent – VAE Decode.

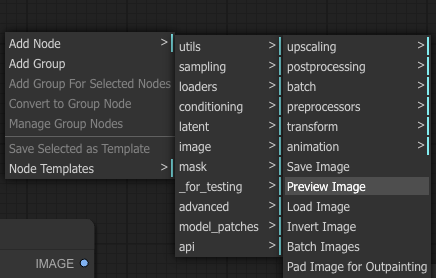
Finally, we want to preview the image. Right-click once more, and Add Node – image – Preview Image.
Cool, we know how it works at this stage. CLIP turns our prompt into something the model can understand. The model generates the image from noise. We turn the latent image into pixel space with the VAE. Finally, the VAE sends it to the preview image node so we can preview it.
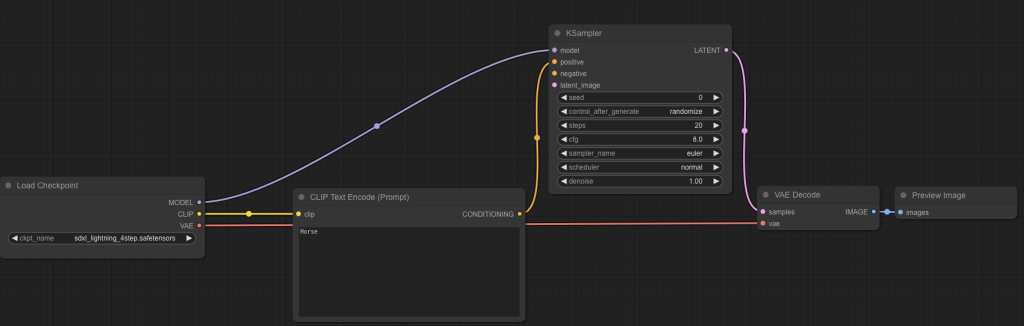
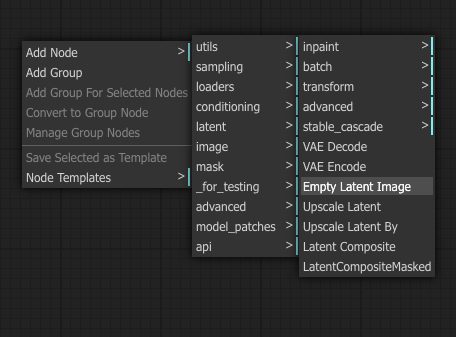
What do we pass into the model? The latent image needs to be noise. So in the KSampler for latent_image we need to attach an Empty Latent Image node. It’s in Add Node – latent – Empty Latent Image.
Sorry if the Title Case, lowercase, CamelCase and various variations in the tool bother you. I promise you get used to it.
Alright – we should be set. Hit Queue Prompt. We’ll find out what we’re missing.
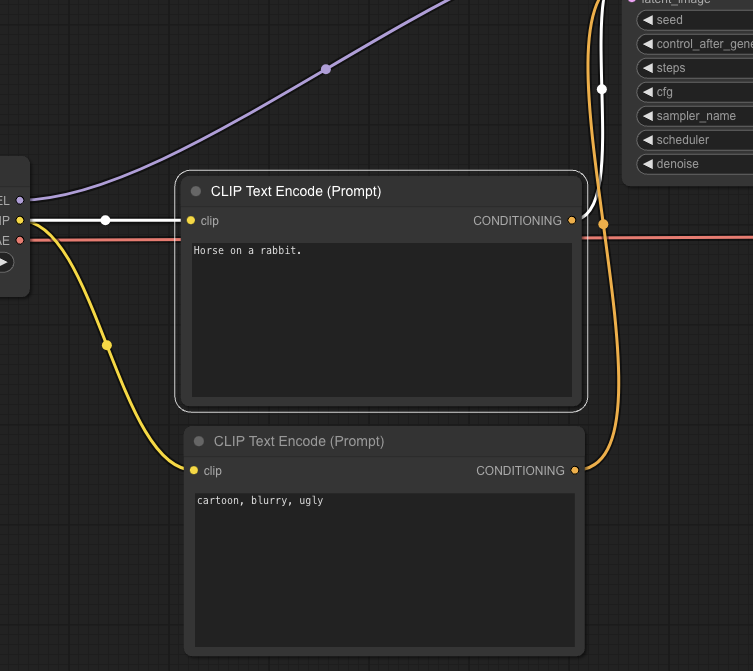
It needs a negative prompt in KSampler. Negative prompt is something the model will avoid. I suppose add another CLIP encode and connect it to negative.
Ok – we set.
For the positive prompt, I wrote “Horse on a rabbit.”
For the negative prompt, I prompt-engineered “cartoon, blurry, ugly.”
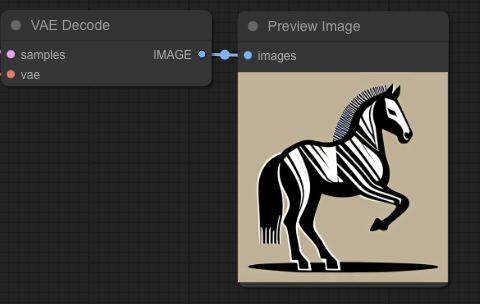
Queue the prompt and let us see what is up.
uhh it’s pretty bad.
To improve the image, we’ll have to do some reading on the Huggingface page and see what they recommend for the settings.
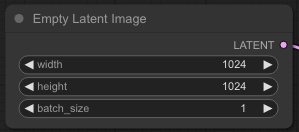
Ok, so the image recommendation is 1024 x 1024; a larger size than what we had.
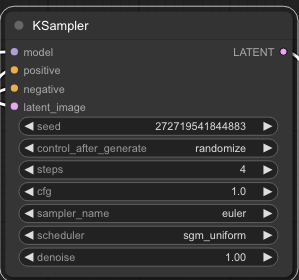
As the model name suggests in KSampler we want 4 steps. There are some other things too like cfg of 1 and the sgm_scheduler. It’s interesting.
CFG means Classifier Free Guidance scale. It is basically how literally the model follows your prompt. Different models favor different numbers. sgm_uniform is the method with which it de-noises during each step of image generation. It’s one of many schedulers you should probably look up.
Cool so our Latent Image is 1024 x 1024 and our KSampler looks like this.
The horse on a rabbit is now this image.
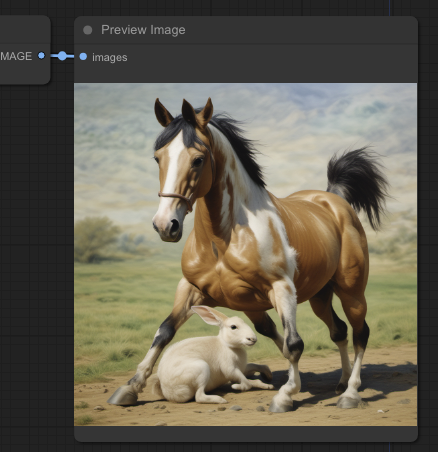
Beautiful.
Go forth and experiment.
Tips for further study
- Probably image to image
- It’s trivial to make one of those AI headshot workflows so maybe try that.
- LORA is a way to modify how a pretrained model behaves. There are a bunch of them to make images look like anime, comic book, cinematic etc.
- Custom nodes are nice; there are a lot of useful default ones in ComfyUI already but you can add more and eventually create your own.
References
- https://github.com/comfyanonymous/ComfyUI
- https://huggingface.co/ByteDance/SDXL-Lightning